Chat layout gives you direct control over the space used by a Gemini conversation, its prompt box, and your own messages. Use it when the default layout feels too narrow for comparison work, too wide for focused reading, or when you want the prompt box to line up with the conversation.
It is part of Theme customization, so your layout settings stay available even when you hide the quick shortcut.
On gemini.google.com, select the Chat layout icon in the top bar. It sits immediately to the left of the Theme icon. The compact panel opens below the icon and applies changes to the current Gemini page as you adjust them.
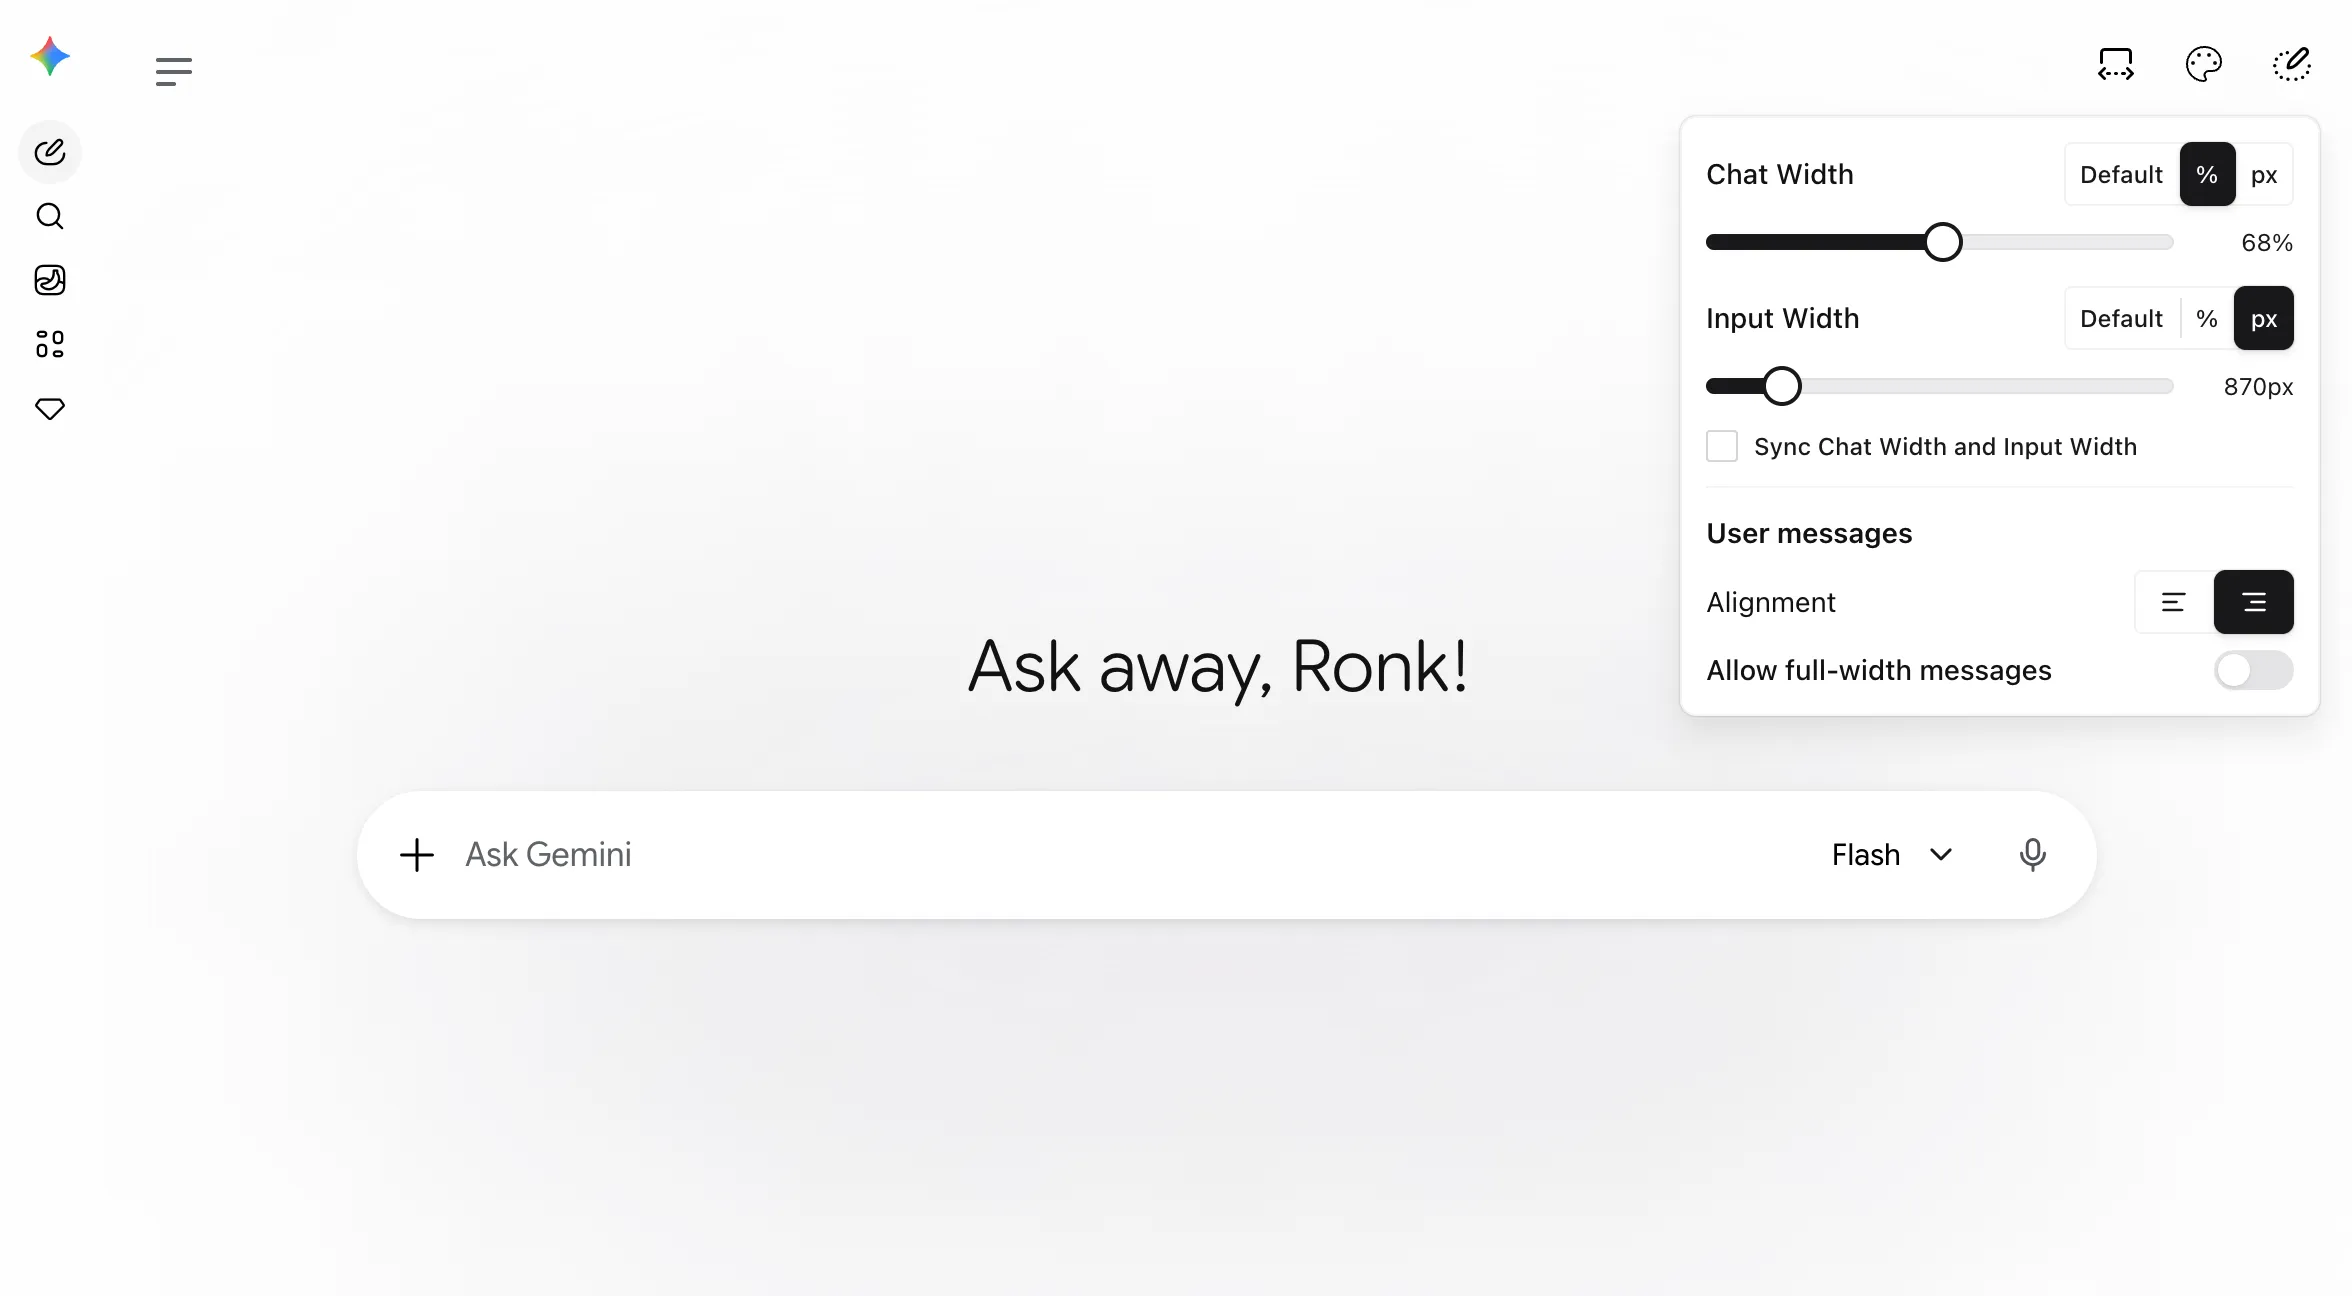
Chat layout feature panel — set chat and prompt widths, then adjust how your messages use that space.
Chat Width
Sets the maximum width of Gemini’s conversation content. Choose Default to keep Gemini’s native width, % for a viewport-relative maximum, or px for a fixed maximum.
Use a wider value for tables, code, and side-by-side reading; choose Default when you want Gemini’s original layout back.
Input Width
Sets the maximum width of the Gemini prompt area using the same Default, percentage, and pixel modes.
Use it when you prefer a compact prompt box or want it to align with a separately sized conversation.
Sync Chat Width and Input Width
Keeps the prompt area matched to the chat width. When it is on, changing either width control updates both.
Recommended when you want a clean, aligned writing surface without maintaining two values.
User messages
Choose left or right alignment for your messages, and turn on Allow full-width messages to let long messages use the full available chat width.
Left alignment can make a conversation read more like a document; full width is useful for long prompts or pasted content.
- Open gemini.google.com and select Chat layout in the top bar, immediately left of Theme.
- For Chat Width and Input Width, choose Default, %, or px.
- When using %, set a value from
35% to 100%. When using px, set a value from 700px to 2000px.
- Turn on Sync Chat Width and Input Width if both areas should stay aligned.
- Under User messages, choose left or right alignment and optionally enable Allow full-width messages.
- Return a width control to Default whenever you want Gemini’s native maximum width for that area.
Changes appear immediately and are kept for future Gemini pages. Switching a width to Default removes only that width override; it does not erase the last percentage or pixel value you chose.
The Chat layout shortcut is shown by default. To hide or restore it:
- Open the Gemini Power Kit settings panel in Gemini.
- Open Settings and then Enhancements.
- Under Top bar customization, turn Show Chat layout shortcut off or on.
Turning this switch off only hides the top-bar icon and closes its open panel. It does not reset your Chat layout choices or stop them from applying. You can always manage the same controls from Settings → Theme → Chat layout, then turn the shortcut back on whenever you want faster access.
- Chat layout changes maximum widths; the available viewport can still make the visible area smaller.
- Default preserves Gemini’s native width for that control.
- This version does not change font size or line height.
- Gemini’s interface can change over time. Keep Gemini Power Kit updated for the latest compatibility fixes.